The method described in this article, ‘DoDirectPayment,’ is depricated. It will work for existing users, but no new users are allowed.
Important: PayPal isn’t accepting new users for this feature, and we require existing users to upgrade to our Advanced Debit and Credit solution that supports EMV 3DS (3DS 2.0) for PSD2. Our Advanced Debit and Credit solution enables highly customizable custom-card fields and reduced PCI Compliance requirements. For more information, see Set up advanced credit and debit card payments.
— From the PayPal Developer website.
Story time…
In 2013, the company I work for acquired another company and everything that came with it. They had an e-commerce website using PayPal as the payment processor. It was an outdated site that needed work on both the front and back ends, but we were reluctant to touch it since it wasn’t broken.
But then things changed. In 2018, the Payment Card Industry Security Standards Council (PCI) required that all transactions use TLS 1.2. The firm that built and maintained the old website didn’t imbue us with confidence, nor did they have a roadmap for updating the site. A decision was made to move the website in-house, bring it in to PCI compliance, and create a more contemporary design.
I’ve never dealt with PayPal as a developer, but I’ve read about how convoluted their API documentation is. To PayPal’s credit, the information is there, you just have to know where to look.
Getting Started
This all assumes you have a PayPal business account already setup. If not, PayPal offers a great “sandbox” environment for developers to test code on — https://sandbox.paypal.com. It looks and feels like the real thing. The examples below will be using my sandbox account.
The easiest way to accept PayPal payments is with PayPal buttons, but this wasn’t an option for obvious branding reasons. I didn’t want the PayPal logo on our website.
The solution I went with was called “DoDirectPayments.” With your real or fake PayPal account, you will need to login and access your API credentials. You can access this by clicking on Tools->API credentials.
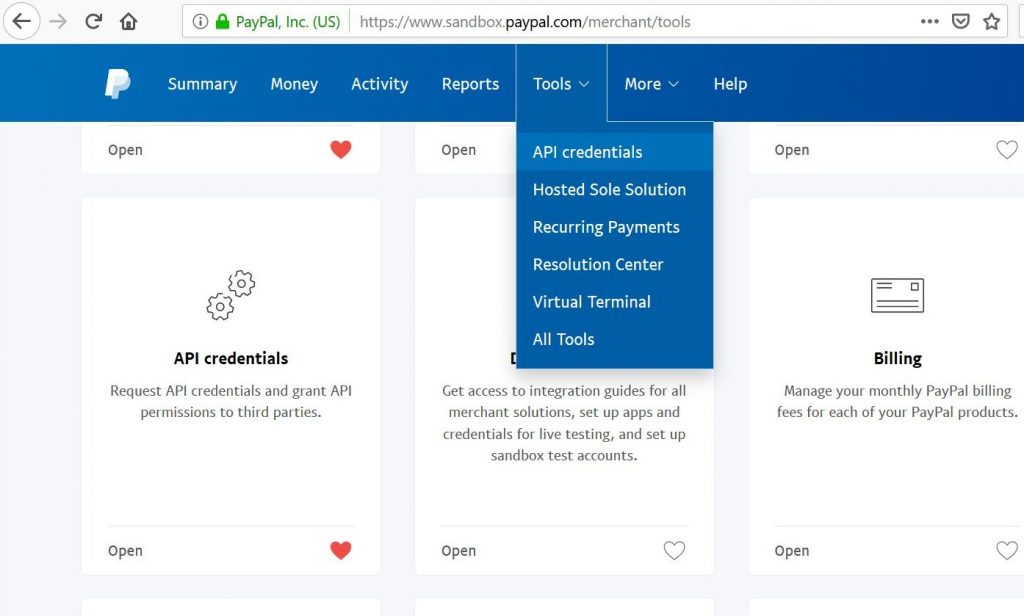
Update: API Credentials are now located under the “Activity” tab.
If you do not have this option, make sure you have a Business account setup. From the PayPal toolbar, go to More->Business setup, and then Payment setup
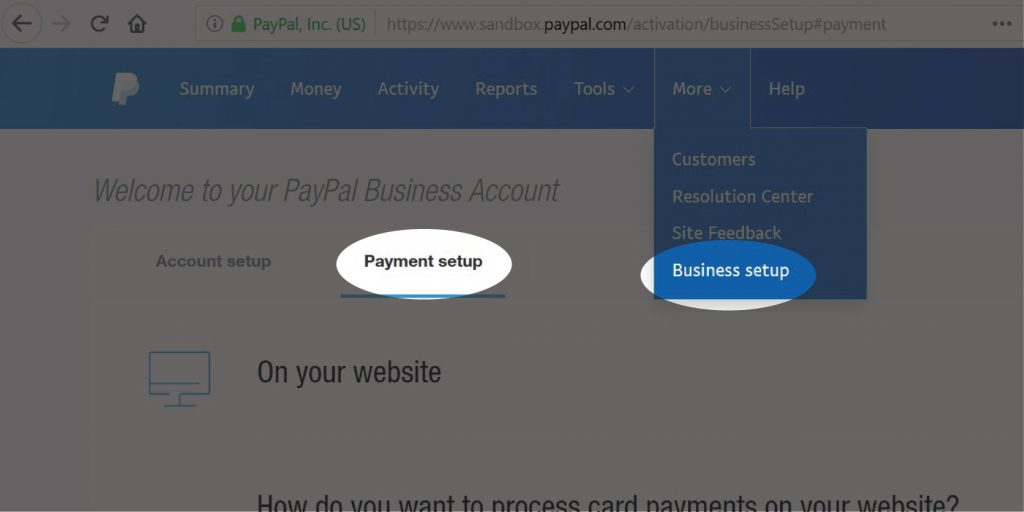
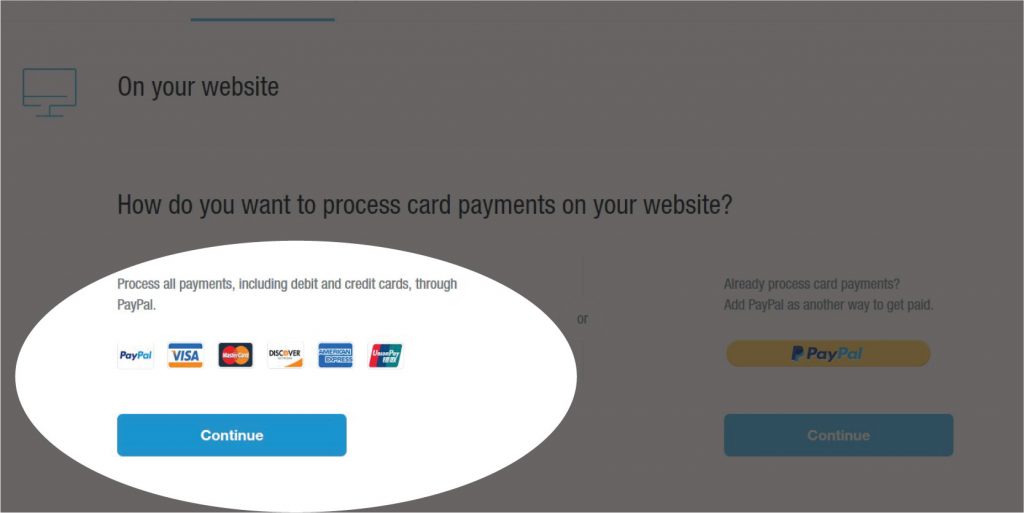
On the next screen, select the option that looks like the one below.
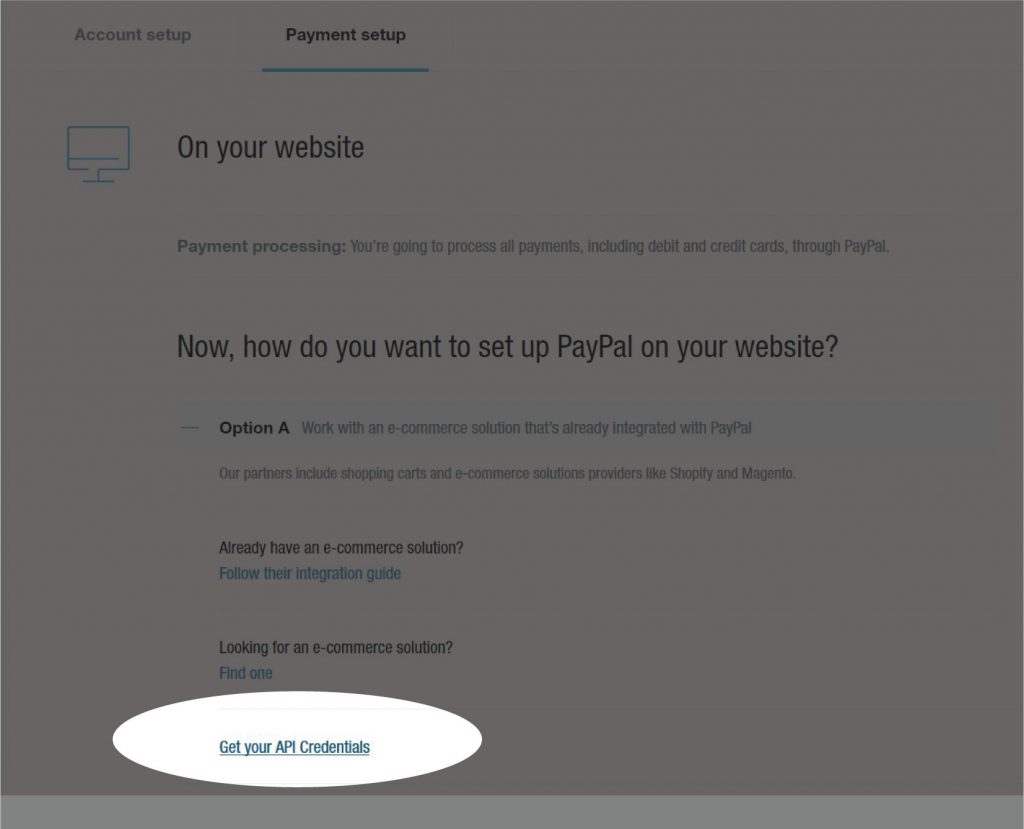
On the next screen, select the option that talks about integrating with “an e-commerce solution,” and you will see an option to “Get your API Credentials”
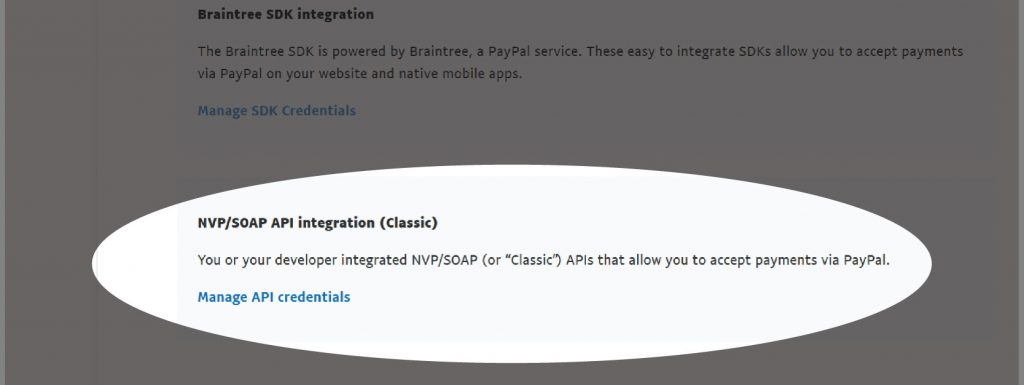
The method we’re using to access PayPal is the “Name-Value Pair” NVP API Integration.
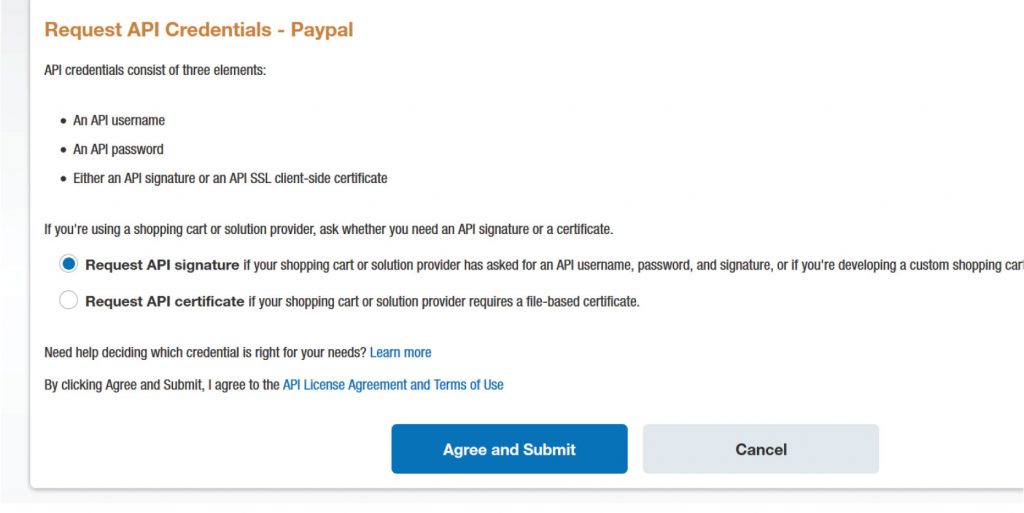
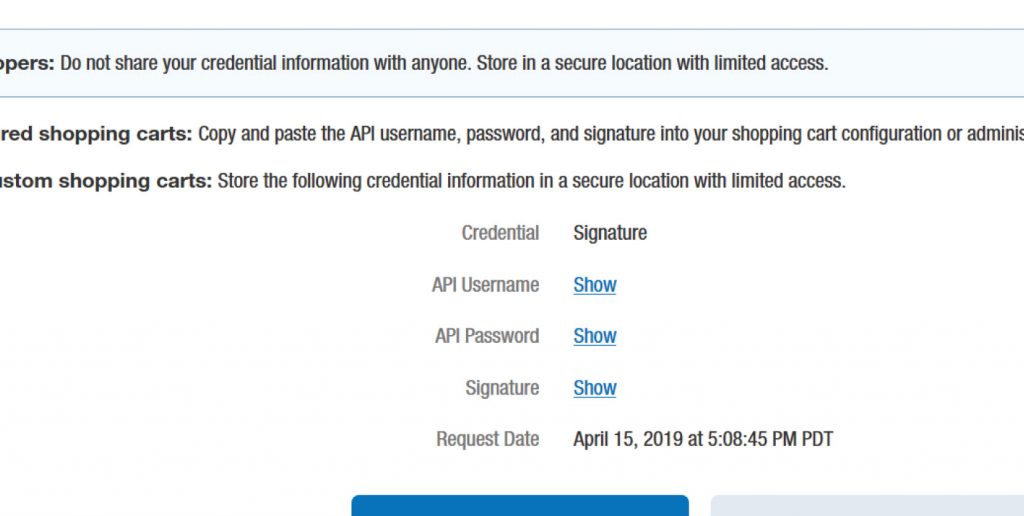
Next, click “Agree and Submit” to get your API signature.
You have three pieces of information here after you “Show” them. All three are needed.
The Code
The module doing all the heavy lifting is called LWP::UserAgent. This library will allow you to programmatically execute web requests, which is the basis of a lot of web-API’s.
The API I used is called NVP or Name-Value Pairs. Each piece of information consists of a “key” and “value” pair separated by ‘=’ and pairs of data are delimited by ‘&’ – it resembles an HTML form POST or GET url. For example
FIRSTNAME=JOHN&LASTNAME=DOE
I work with one of two URI endpoints: the “sandbox” URI is used when the site is in “testing” and the other is for the “live” production environment.
$uri = "https://api-3t.sandbox.paypal.com/nvp";
$uri = "https://api-3t.paypal.com/nvp";
All of the static variables below will need to be populated by your e-commerce platform. The credentials will also need to be changed to your own.
I’ve opted to use a Perl hash to store the Named variables because it makes it easier to convert to JSON for export to a database or the client browser. My JSON library of choice is JSON::MaybeXS.
Most of the variables below would not appear in an actual server-side script. All the information would be collected by the client’s web browser, packed in JSON or XML, and then parsed by your code after the browser transmitted it.
Download the code paypal.pl
#!/usr/bin/perl

use CGI qw/:standard/;
use JSON::MaybeXS qw(encode_json decode_json);
use Data::Dumper;
use LWP::UserAgent;

# API Credentials
$payload{'SIGNATURE'}='YOUR SIGNATURE FROM PAYPAL';
$payload{'USER'}='YOUR API ID FROM PAYPAL, NOT THE PAYPAL LOGIN';
$payload{'PWD'}='YOUR API PASSWORD, NOT THE PAYPAL LOGIN PASSWORD';

$payload{'VERSION'}='56.0';             # Don't Modify these unless
$payload{'METHOD'}='DoDirectPayment';   # you know what you
$payload{'PAYMENTACTION'}='Sale';       # are doing.

$payload{'IPADDRESS'}='8.8.8.8';        # IP of client captured by your backend code
$payload{'ITEMAMT'}='90';               # Subtotal of purchase costs
$payload{'SHIPPINGAMT'}='10';           # Shipping Costs
$payload{'AMT'}='100';                  # Total Amount to charge, this has to equal SHIPPINGAMT + ITEMAMT
$payload{'ACCT'}='4111111111111111';    # Fake Visa Credit card number will work with PayPal Sandbox
$payload{'CREDITCARDTYPE'}='VISA';      # Card ID
$payload{'EXPDATE'}='012021';           # Expiration, MMYYYY
$payload{'CVV2'}='123';                 # Card Security Code

$payload{'FIRSTNAME'}='JANE';
$payload{'LASTNAME'}='DOE';
$payload{'STREET'}='123 MAIN STREET';
$payload{'CITY'}='LITTLE ROCK';
$payload{'STATE'}='AR';
$payload{'ZIP'}='72103';
$payload{'COUNTRYCODE'}='US';
$payload{'EMAIL'}='soccermom@aol.com';

@chars = ( 1 .. 9 );
$randomOrderNo = join("", @chars[ map { rand @chars } (1 .. 6) ]);
$payload{'INVNUM'} = $randomOrderNo;    # Random Order Number.  This has to be unique between tests.

$payload{'SHIPTONAME'} = 'JANE DOE';
$payload{'SHIPTOSTREET'} = '123 MAIN STREET';
$payload{'SHIPTOSTREET2'} = 'Apt. 1';
$payload{'SHIPTOCITY'} = 'LITTLE ROCK';
$payload{'SHIPTOSTATE'} = 'AR';
$payload{'SHIPTOZIP'} = '72103';
$payload{'SHIPTOCOUNTRY'} = 'US';

foreach $key (keys %payload){
    $restpayload .= "$key=$payload{$key}&";
}

$ua = LWP::UserAgent->new(ssl_opts => { SSL_version => 'tlsv12' });
$uri = "https://api-3t.sandbox.paypal.com/nvp"; # Sandbox Endpoint
#$uri = "https://api-3t.paypal.com/nvp";        # Production Endpoint

# Post payload hash to PayPal, store response for later
$response = $ua->post($uri,Content => $restpayload);

# Parse response from PayPal
@pairs = split(/&/,$response->{'_content'});

foreach $line (@pairs){
    ($key,$value) = split(/=/,$line);

    $value =~ s/\+/ /g;
    $value =~ s/%(..)/pack("c",hex($1))/ge;

    $transaction{$key} = $value;
}

# Print exit status from PayPal
if($transaction{'ACK'} eq 'Failure'){
    print "Card process failed\n";
}
elsif($transaction{'ACK'} eq 'Success'){
    print "Card process success\n";
}
Parsing Card Numbers and Identifying Type
You can determine the card carrier type with either JavaScript on the front end or with regex on the back end.
if($number =~ /^4[0-9]{12}(?:[0-9]{3})?$/){
    $cardtype='Visa';
}
elsif($number =~ /^5[1-5][0-9]{14}$/){
    $cardtype='MasterCard';
}
elsif($number =~ /^65[4-9][0-9]{13}|64[4-9][0-9]{13}|6011[0-9]{12}|(622(?:12[6-9]|1[3-9][0-9]|[2-8][0-9][0-9]|9[01][0-9]|92[0-5])[0-9]{10})$/){
    $cardtype='Discover';
}
The form below is tied into a PayPal sandbox account. It will catch some invalid input (bad expiration, incorrect total) but the sandbox is primarily used to test code integration.
Client IP address is submitted server-side and a unique order number is randomly generated.
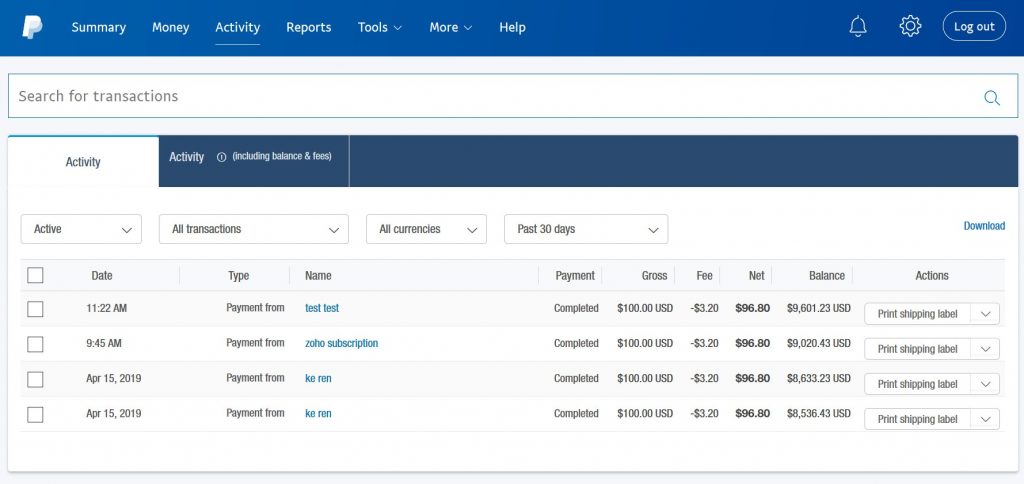
All of these fake transactions will eventually show up in your PayPal sandbox account.
Conclusion
There are, of course, libraries that deal specifically with PayPal, but debugging problems are easier if you’re dealing with a platforms native API.
Additional reading:

