Hyper-V Server is great and it’s also completely free. Yes, Windows 10 Pro comes with the option to install and run Hyper-V, but anyone running more than a couple of virtual machines will eventually gravitate towards a dedicated virtualization server.
So how do you manage Hyper-V Server if it doesn’t have a GUI? Any Windows 10 Pro machine on the same network with Hyper-V Manager installed can connect to a Hyper-V Server and manage it remotely. The Hyper-V Manager is often conflated with a Hyper-V Server but they’re not the same thing.
Running a Hyper-V server in a corporate Active Directory environment is the norm. But if your Windows network isn’t in a domain, then using Hyper-V in a Workgroup requires some tweaking between the host and client.
Let’s get started.
1. The Hyper-V Server Core
Below is a fresh install of Hyper-V Server 2019 with the default “sconfig” and “cmd” windows.
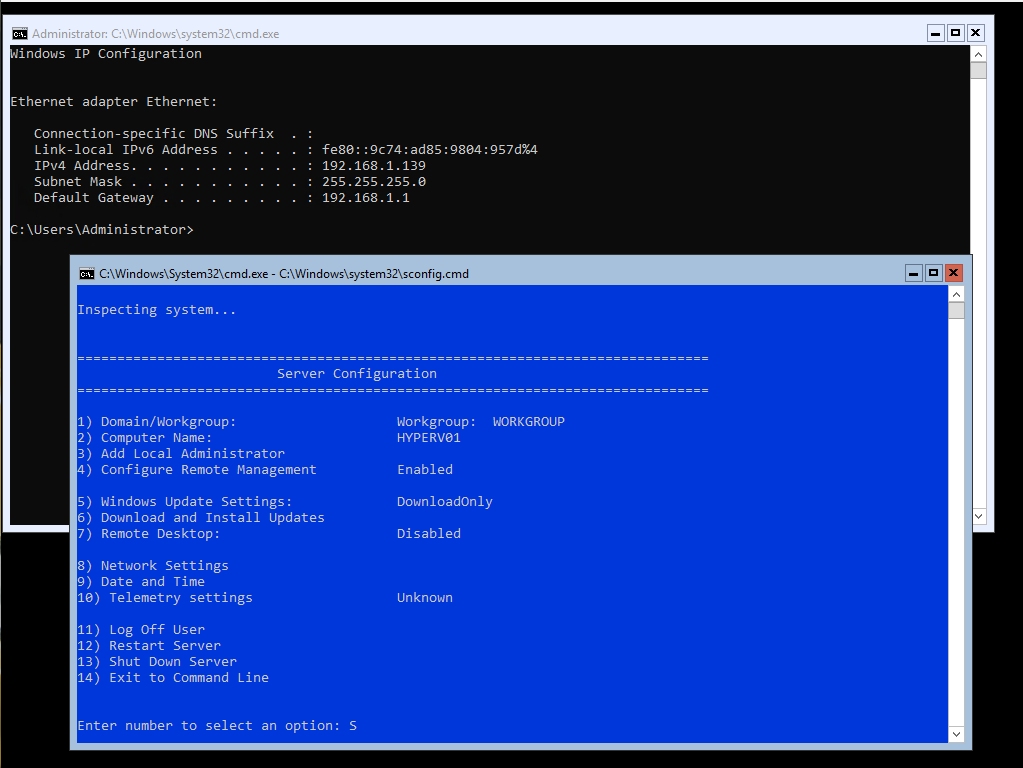
As you can see, I have named my server HYPERV01, my IP Address is 192.168.1.139 and I am in the Workgroup WORKGROUP. I will use these values going forward.
2. The Windows 10 Client
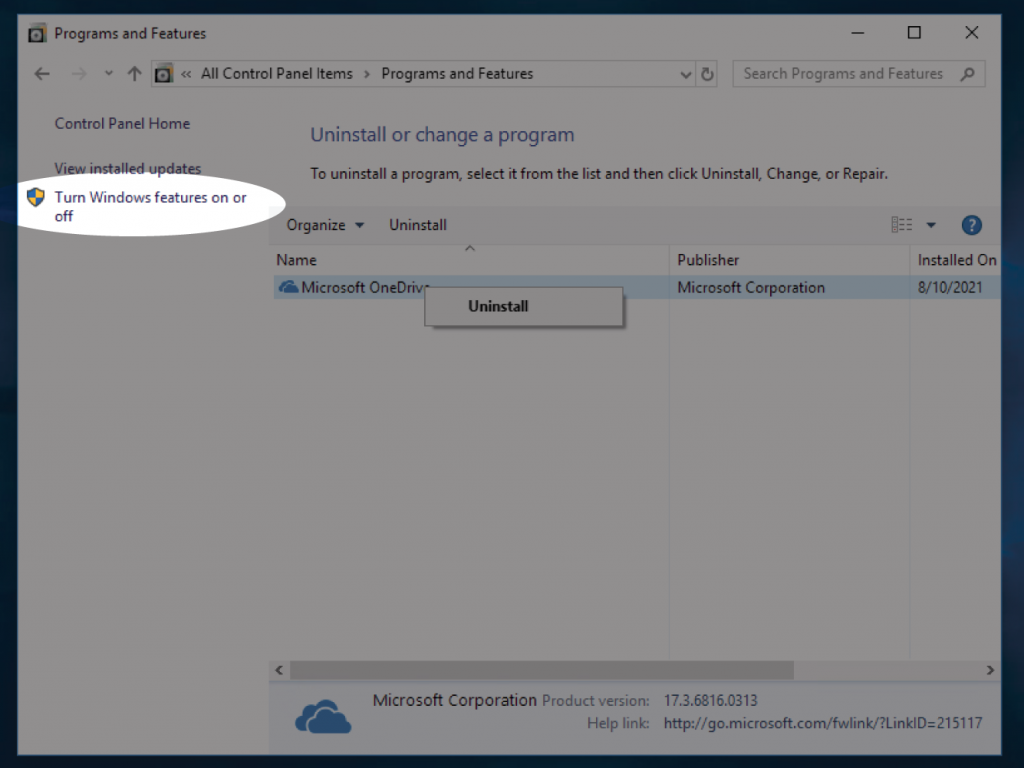
You will first need to install Hyper-V Manager by opening Control Panel and clicking Turn Windows features on or off.
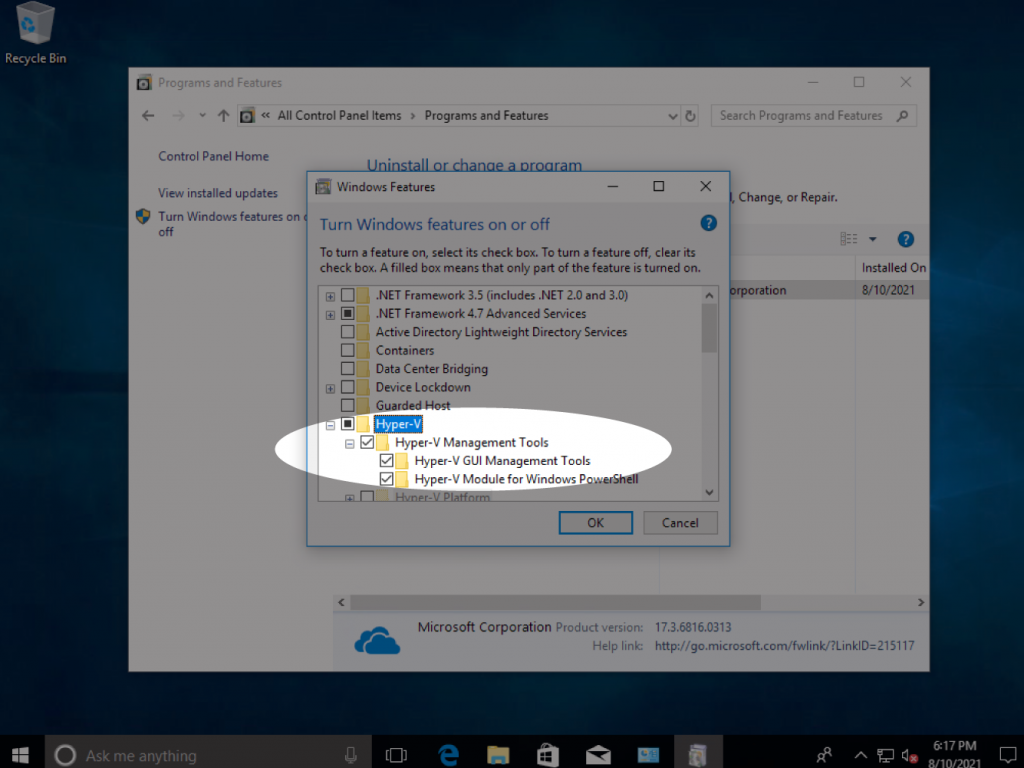
Select Hyper-V as shown above and click OK. This Windows 10 client is also in the same WORKGROUP as HYPERV01. This will install the Hyper-V Manager, the user interface for managing Hyper-V. It can connect to and manage multiple Hyper-V Servers and their Virtual Machines from a single interface.
3. Attempting to Connect


Trying to connect to HYPERV01 with the your Administrator username and password will fail. I admit I spent hours in 2016 trying to get Hyper-V Server 2016 working. Both the Hyper-V Server and Windows 10 Client will need additional configuration.
4. Configuring the Hyper-V Server
The Hyper-V Server only needs to execute two commands. Open a Powershell prompt (not a command prompt) and type these two commands:
Enable-PSRemoting
Enable-WSManCredSSP -Role server
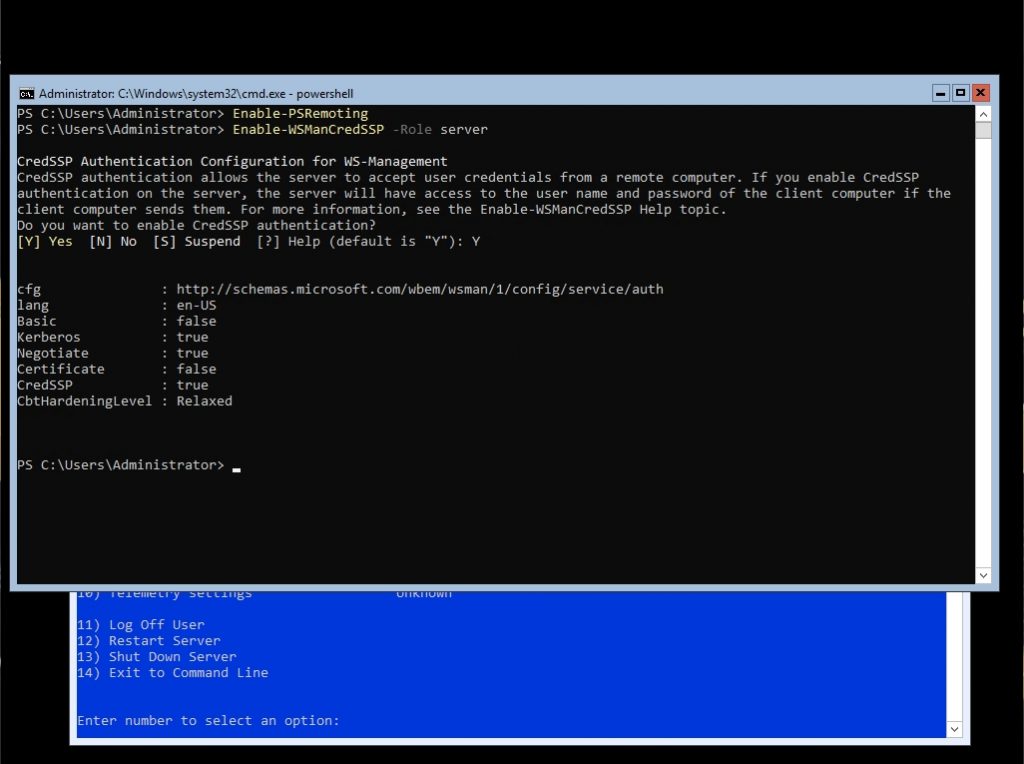
That’s it for the server. Jot down its IP address if you haven’t already.
5. Configuring the Windows 10 Client
Add your Hyper-V Server to your hosts file
On the Windows 10 Client, open an elevated PowerShell by right-clicking the Start Menu and clicking Windows PowerShell (Admin), or search for PowerShell and run it as Administrator. Once there, type this command:
notepad c:\windows\system32\drivers\etc\hosts

Add your Hyper-V Server to the hosts file similar to the image above. Save the file and exit notepad and return to the PowerShell prompt.
Set your network connection type to PRIVATE in a Workgroup Environment
Back in the PowerShell prompt, determine your network’s name and set the connection type to Private.
Get-NetConnectionProfile
Set-NetConnectionProfile -Name "YOUR_NETORK_NAME" -NetworkCategory Private
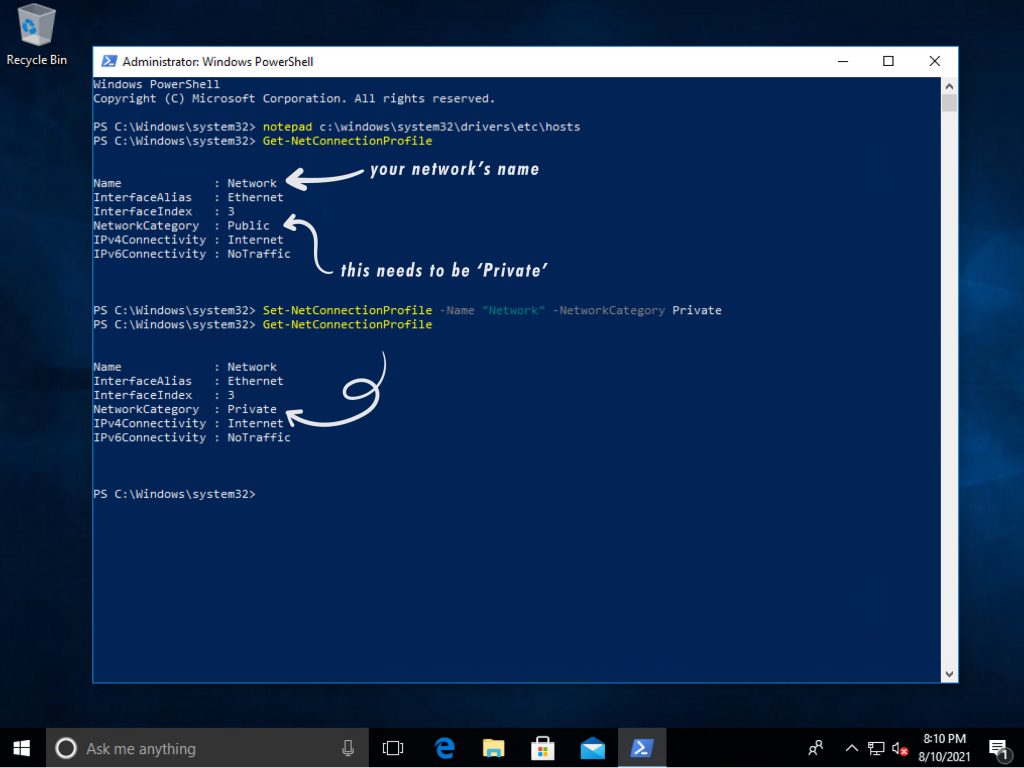
Back in the PowerShell prompt, type the following, replacing hyperv01 with your server name:
Enable-PSRemoting
Set-Item WSMan:\localhost\Client\TrustedHosts -Value hyperv01
Enable-WSManCredSSP -Role client -DelegateComputer hyperv01
Enable-WindowsOptionalFeature -Online -FeatureName:Microsoft-Hyper-V -All
cmdkey /add:hyperv01 /user:Administrator /pass

The last command will ask you for the Administrator password to your Hyper-V Server.
Changing Local Computer Policy
Open the Local Group Policy Edit by running gpedit.msc
Expand Local Computer Policy> Computer Configuration> Administrative Templates>System, and click Credentials Delegation.
In the Settings pane, double-click Allow Delegating Fresh Credentials with NTLM-only Server Authentication.
In the Allow Delegating Fresh Credentials with NTLM-only Server Authentication dialog box
- Click Enabled.
- In the Options area, click Show.
- In Value, type WSMAN/*, and then click OK.
- Select ‘Concatenate OS defaults with input above’
- Click OK on all dialog boxes and exit the Local Group Policy Editor.

Logging in to your Hyper-V Server

Open your Hyper-V Manager and right-click on the “Hyper-V Manager” icon on upper left and click ‘Connect to Server…’
Enter the name of your Hyper-V server (not the IP address) and set the username as shown above along with your password.
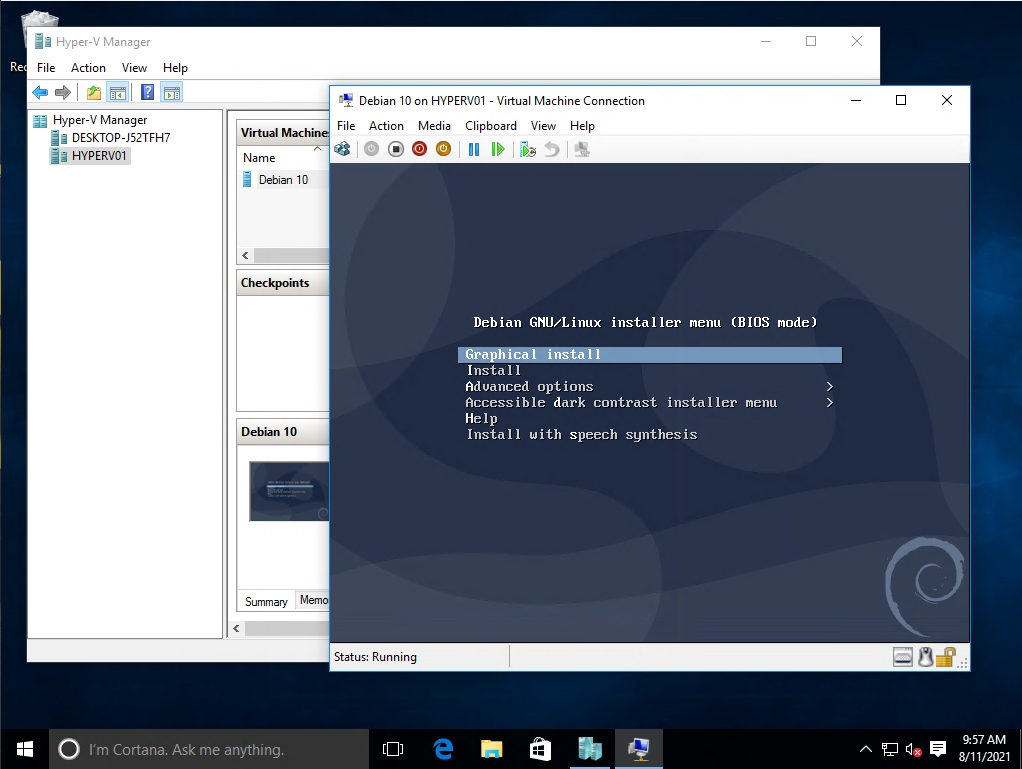
Once connected, you should be able to create new Virtual Machines and begin installing operating systems.
Miscellaneous Tips
1. Mounting network shares from the Hyper-V Server
If you’re having trouble mounting network shares, run regedit and navigate to
[HKEY_LOCAL_MACHINE\SYSTEM\CurrentControlSet\Services\LanmanWorkstation\Parameters]
and change AllowInsecureGuestAuth to 1. Then mount shares like this:
net use F: \\192.168.1.100\ShareName
Conversely, you can share a path on the Hyper-V filesystem using:
net share SHARENAME=C:\PATH
2. Installing Additional Software
Hyper-V Server Core has no traditional GUI, but it still has most of the Windows underpinnings. Installing standard software is still possible. Access the installer from the command prompt, execute and cross your fingers. Using it to run desktop applications defeats the purpose of having Hyper-V Server Core, but it does give you options in a pinch.


