The dangers of exposing Remote Desktop Protocol (RDP) to the internet are well documented. It’s no surprise that a tool designed for ease of use has become a prime target for scripted brute force attacks and other exploits, allowing compromised machines to serve as attack vectors for Ransomware.
There are several practices for enhancing Remote Desktop security — password policies, GEOIP Filtering, VPN, 2FA — but my preferred solution, by far, is an SSH Tunnel.
An SSH tunnel has been called a poor man’s VPN. Much like a VPN, a connection is first established to a remote server and network traffic is passed through the remote server and forwarded to a target computer. SSH tunneling allows almost any type of traffic through using any port number.
Here is a quick view of how this works.

For clarity, lets assume you are at home and want to connect to your workstation in your office. I will use these terms:
- Home Network: This is your home network.
- Remote Network: This is your work network.
- Your Computer: The computer on your home network.
- Remote Computer: The computer at work you are trying to connect to that is on the Remote Network.
- SSH Server: The computer on your Remote Network running an SSH server. This server is analogous to a VPN server.
1. The Remote Network
The Remote Network will need:
- The Remote Computer you are connecting to (and private IP address to this machine!)
- A computer running an SSH Server.
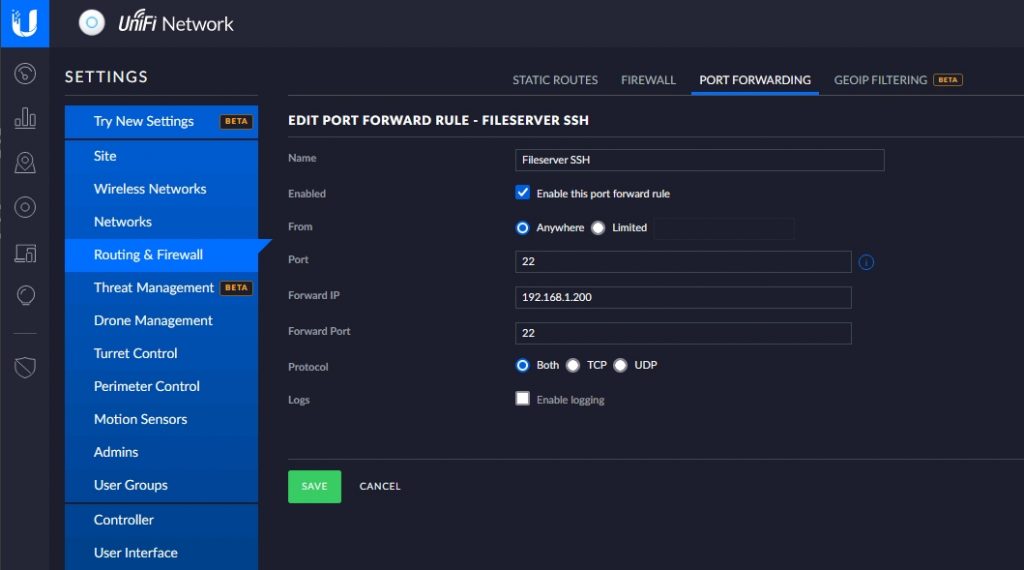
- Router or firewall rules that allows connection to the SSH Server using Port 22.
- The public IP address to this Remote Network
The Remote Computer you are connecting to will need to have RDP enabled and you will need valid credentials for this machine.
You will need valid credentials to the SSH Server. Use public key authentication instead of password authentication. See my post here on Public Key Authentication with PuTTY.

You will need to configure your firewall on the Remote Network to forward your SSH Port to your SSH Server. The image above is an example of a typical configuration for port forwarding.
2. Connecting to the Remote Network
First you will need to login from Your Computer to the SSH Server and create a tunnel to the Remote Network. If you’re using the Windows SSH client, open a CMD prompt on Your Computer and type something like this:
ssh -L 8888:192.168.20.103:3389 root@remotenetwork.com
If you’re using another port besides ’22’, use the ‘-p’ flag
ssh -L 8888:192.168.20.103:3389 root@remotenetwork.com -p 1234
This command should also be valid on MacOS, Linux, FreeBSD, or practically anything using OpenSSH.
Breaking down the command:

- SSH Command: Launches the SSH client and listens on Your Computer
- Local Port: This is an arbitrary port number that Your Computer will use to connect to the SSH tunnel. This port number can be any valid port number provided it is not already in use or restricted by Windows. Using the default port of 3389 sounds like a good idea, unless your machine is already using 3389 for RDP. If that doesn’t make sense, just pick a number and don’t worry about it. Most numbers above 1024 will work.
- Remote Desktop Machine: This is the IP address of the Remote Computer
- Remote Port: This is the RDP port on the Remote Computer. This is most likely the default RDP port 3389.
- Username: This is the username for the SSH Server
- Remote Network IP Address: This is the public IP address of your Remote Network.
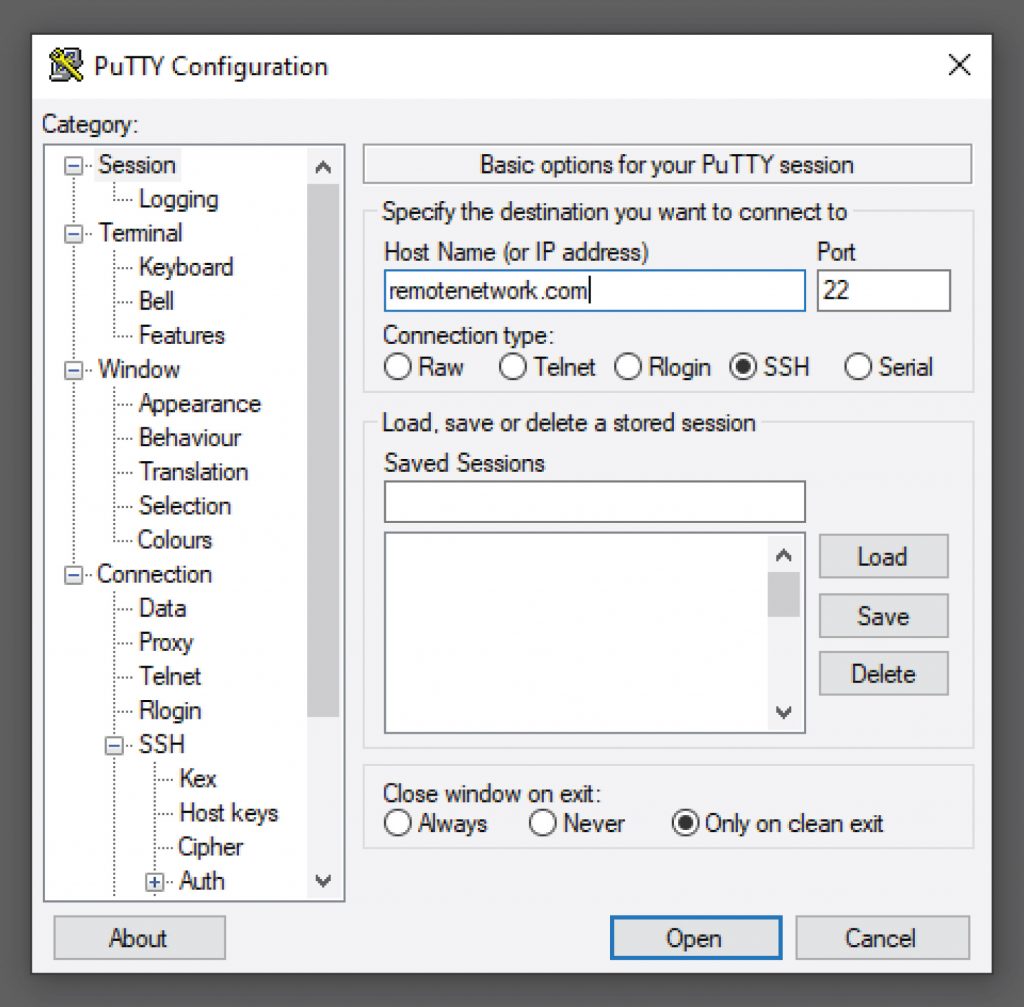
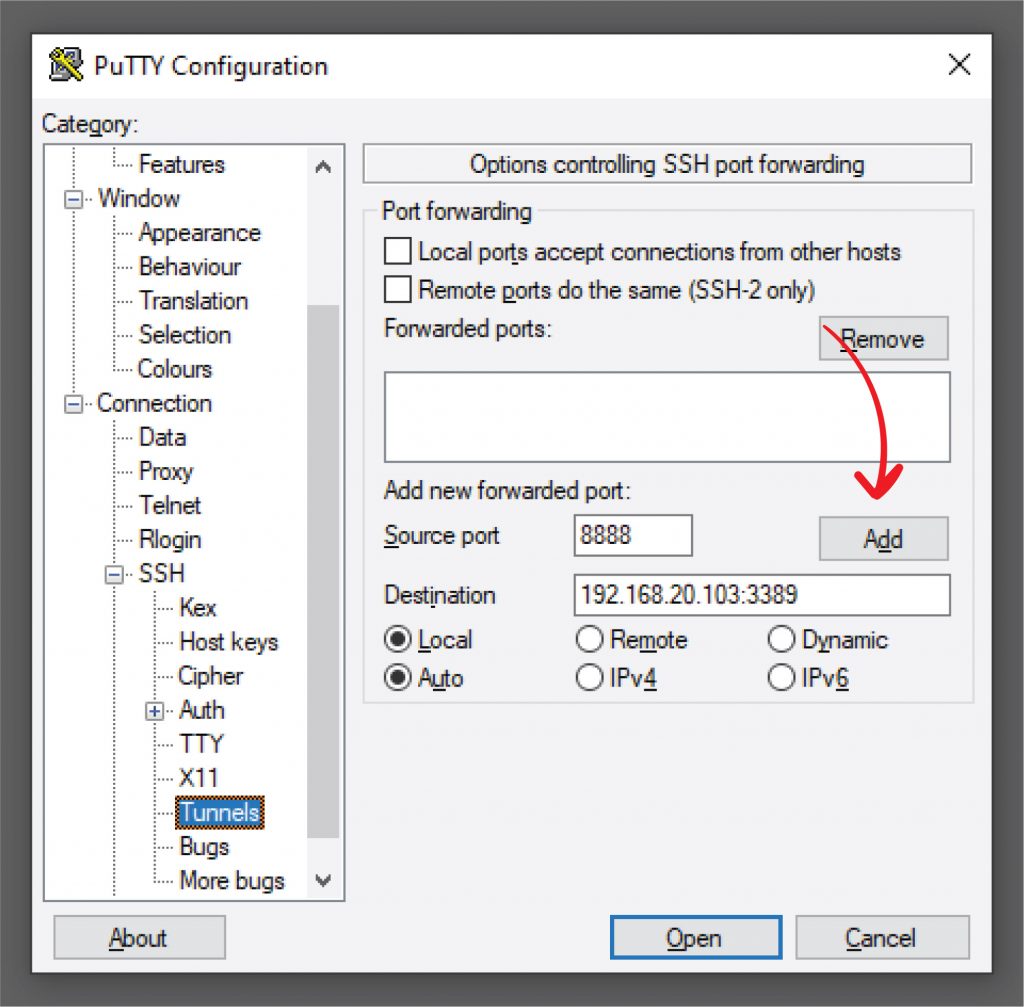
Here is the equivalent in PuTTY:


The great thing about using PuTTY is the ability to save all this information on a per-server basis. Pinning PuTTY to the start menu in Windows 10 gives you a quick connection list.

3. Using the Tunnel
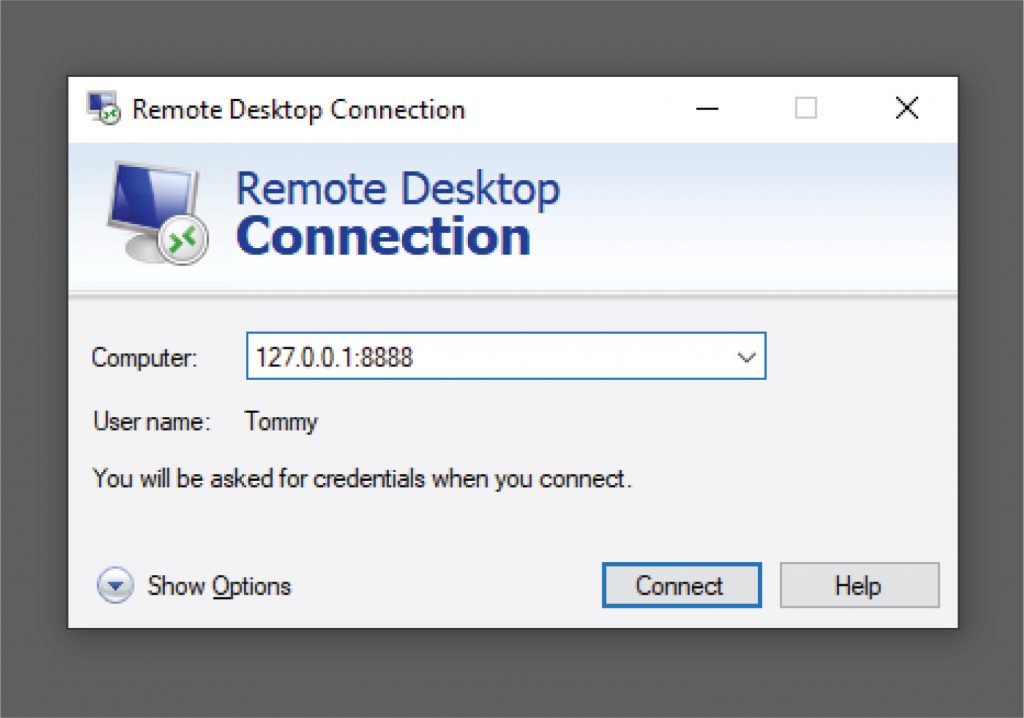
Once you have connected to the SSH Server from the previous step, the last thing to do is launch Remote Desktop Connection App

The IP address HAS TO BE 127.0.0.1. Your computer’s loopback/localhost address, 127.0.0.1, is implied in the SSH command.
# These two commands are functionally the same.
ssh -L 8888:192.168.20.103:3389 root@remotenetwork.com
ssh -L 127.0.0.1:8888:192.168.20.103:3389 root@remotenetwork.com
You can specify a different address and that interface will handle connections. Using an address other than localhost will allow other computers on the same subnet to use the tunnel.
ssh -L 192.168.1.100:8888:192.168.20.103:3389 root@remotenetwork.com
The tunnel that was created is a wormhole that “opens” on Your Computer, passes through the SSH Server and “exits” on the Remote Computer. After the “wormhole” is created, Your Computer and the Remote Computer are spatially and temporally bound on ports 8888 and 3389.

Final Thoughts
SSH Tunneling is not limited to Remote Desktop. Practically any port can be passed through an SSH tunnel. Just to name a few use cases:
- Unifi Network Manager
- Intranet devices with a web interface
- Dell iDRAC, ILO or IPMI
- Other SSH servers
Multiple RDP sessions, or sessions of anything can also be opened, provided you create a unique local port on Your Computer. Stacking happens as such:
ssh -L PORT:IPADDRESS:PORT -L PORT:IPADDRESS:PORT username@host
All of these connections happen through a single connection to your Remote Network through Port 22. It fits my use case because Port 22 is always open for remote administration though SSH and backups through rsync.
There are more advanced uses for tunnels not covered here. The local “wormhole” can bind to an interface other than 127.0.0.1 to expose the tunnel to the rest of the local network. The port behavior of the tunnel can also be reversed using the -R flag instead of the -L flag, meaning remote and local respectively.
This post is a followup to Part 1: Public Key Authentication with PuTTY

